


Woven Wall Hanging Craft For Beginners
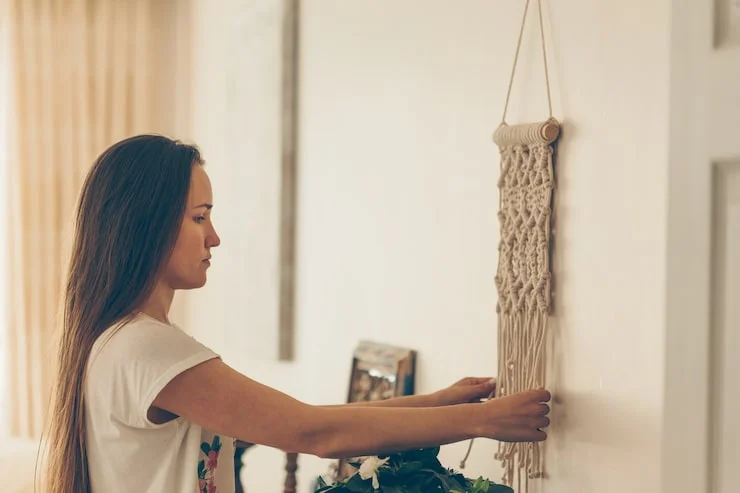
A woven wall hanging is a piece of art you make by pulling yarn over and under tight vertical strings on a frame. You do not need special talent to start. You need a frame, some string, a few balls of yarn, and about two to three hours of quiet time. This guide walks you through the whole process, from setting up your loom to hanging the finished piece on your wall. Every step uses plain language and avoids the confusing terms that make most craft tutorials feel like they were written for people who already know what they are doing.
What You Actually Need Before You Start?
Most beginner weaving guides throw a long supply list at you and assume you own a proper weaving loom. You do not. A sturdy picture frame or a piece of cardboard works fine for your first project. The goal is to learn the motion of weaving, not to buy equipment you may never use again.
Here is the short list of what matters:
-
A frame for your loom. A wooden picture frame with the glass removed works well. So does a piece of thick cardboard cut to the size you want your wall hanging to be. If you fall in love with weaving, you can buy a real loom later.
-
Strong string for the warp. The vertical strings on your loom are called the warp. They need to be tight and strong. Cotton string, cooking twine, or strong carpet thread all work. Do not use stretchy yarn for this part. It will sag and your weaving will look lumpy.
-
Yarn for the weaving. The yarn you weave across the loom is called the weft. This is where you get to play. Thick yarn, thin yarn, fuzzy yarn, leftover bits from other projects — all of it works. For your first piece, pick two or three colors you like and one texture that feels interesting to touch.
-
A comb or a fork. You will use this to push each row of yarn down so the weaving stays tight. A wide-tooth comb or a dinner fork from your kitchen drawer is perfect. Craft stores sell special weaving combs, but you do not need one yet.
-
A long needle with a big eye. A plastic yarn needle or a blunt tapestry needle helps you pull yarn through the warp in tight spots. Some people use a flat stick called a shuttle, but a needle is easier for beginners to control.
That is it. You probably have half of these things in your woven wall hanging craft for beginners.
Read Also: Home Decorating Tips for Small Spaces: Make Your Rooms Look Bigger
How to Set Up Your Loom Without Buying One?
Setting up the loom is the part that scares beginners the most. It looks technical. It is not. You are just tying string across a frame in a tight pattern.
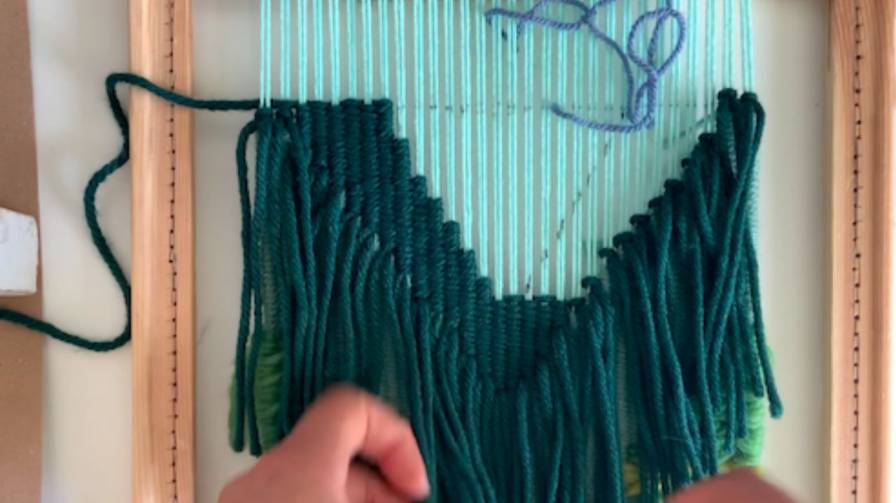
Turn your frame or cardboard so it stands upright in front of you. Tie your strong warp string to the top left corner. Pull it straight down to the bottom left corner and wrap it around once. Pull it back up to the top, leaving about half an inch of space, and wrap it around the top again. Keep going back and forth like this until you reach the right side of the frame. The strings should be tight enough that they make a soft sound when you pluck them, but not so tight that the frame bends. When you reach the end, tie the string off and cut the tail.
The result looks like a tiny harp. Those vertical strings are what you will weave through. The space between each string is where your yarn will go.
One thing to watch: keep your warp strings evenly spaced. If they bunch up on one side, your weaving will be crooked. Count the strings if it helps. Most beginner projects work well with an odd number of warp strings, because it makes the over-and-under pattern alternate naturally from row to row.
The Basic Weave: Over, Under, Repeat
This is the whole craft in one sentence: you pass your yarn over one warp string, under the next, over the next, under the next, until you reach the other side. Then you come back the other way, doing the opposite. If you went over a string on the way across, you go under it on the way back.
Cut a piece of yarn about an arm's length long. Thread it onto your needle. Start near the bottom of the loom, leaving a few inches of yarn hanging loose on the back side. You will tie that loose end in later. Slide the needle over the first warp string, under the second, over the third, and so on until you reach the last string on the right side. Pull the yarn through, but leave it a little loose. Do not pull it tight yet.
Now push that first row down toward the bottom of the frame using your comb or fork. This is called beating the row. You want the row to sit snug against the bottom edge, but you do not want to crush it. A gentle firm press is enough.
Come back the other way. If you went over the first string on your way right, go under it on your way left. The pattern reverses. When you reach the left side again, beat that row down too. Keep going back and forth like this until you have woven an inch or two of solid fabric. This simple pattern is called plain weave, and it is the foundation of almost every woven wall hanging you have ever seen.
What to Do When Your Edges Look Messy
Your first few rows will probably look uneven. The edges might pull inward or bulge outward. This happens to everyone. The yarn is not the problem. The tension is.
The fix is simple. After you beat each row down, look at the edges. If the yarn is pulling the warp string inward, you pulled the weft too tight. If the yarn is looping loosely around the edge string, you left it too loose. Gently pull or loosen the last bit of yarn before you start the next row. Small adjustments now save you from a lopsided wall hanging later.
Another habit that helps: do not pull the yarn tight as you pass it through the warp. Let it lie naturally. The comb does the work of tightening, not your hand. Weaving is a gentle craft. Tension comes from the comb pressing rows together, not from yanking the yarn.
Adding Texture So Your Wall Hanging Does Not Look Flat
Plain weave in one color is a good way to learn, but a wall hanging made entirely of flat rows looks a little boring. The good news is that you do not need to learn new techniques to make your piece interesting. You can change the look by changing the yarn.
When you want to switch colors or textures, finish your current row by leaving a few inches of yarn hanging on the back side. Start the new yarn from the same side, leaving another few inches loose on the back. Weave the new yarn through the same over-under pattern. Later, when the piece is done, you will tie those loose ends together on the back where no one can see them.
Thick, fuzzy yarn creates soft bumps that stand out from the surface. Thin cotton yarn creates clean, tight rows. Mixing a chunky yarn with a smooth one gives you contrast without any extra effort. You can also use the same yarn but vary how tightly you beat the rows. Tighter rows look dense and solid. Looser rows look airy and soft.
If you want a row that really stands out, try this: instead of pulling the yarn straight across, leave small loops sticking up from the surface as you weave. Do not beat those loops down with the comb. They will stay raised, creating a bumpy texture that catches light and shadow. This trick works best with a fuzzy or thick yarn.
Taking Your Weaving Off the Loom
When you reach the top of your warp strings, you are almost done. Cut your working yarn, leaving a tail of a few inches. Thread that tail onto your needle and weave it back through the last row you made, going in the opposite direction. This hides the loose end inside the weaving.
Now you need to free the piece from the loom. Flip the frame over. You will see the warp strings looping around the top and bottom edges. Cut through the middle of each loop. Do not cut the woven fabric itself. Just cut the loops.
You will end up with loose warp ends sticking out from the top and bottom of your weaving. Tie the top two ends together in a tight double knot. Tie the next two together, and the next, until all the top ends are knotted. Do the same at the bottom. These knots hold the whole piece together. If you want a fringe, leave the bottom ends long. If you want a clean edge, trim them short after knotting.
For hanging, cut a piece of strong string or thin rope about twice as wide as your weaving. Tie one end to the top left knot and the other end to the top right knot. The string should form a shallow triangle above the piece. That is your hanger. Find a small nail or hook, and your wall hanging is ready.
Common Beginner Mistakes and How to Avoid Them
The weaving looks narrower at the top than the bottom. This means you pulled the weft tighter as you went up. Weaving tension is hard to keep perfectly even, especially in the beginning. You can fix a slightly uneven edge by gently pulling the fabric sideways with your hands when the piece is off the loom. For your next project, pay attention to how tight you pull the yarn in the first few rows and try to match that feeling all the way up.
The warp strings are visible through the weaving. This happens when you beat the rows too hard or use a yarn that is too thin for the spacing of your warp. If you can see the vertical strings peeking through the horizontal rows, you are pressing too firmly with the comb. Lighten your touch. You can also double up thin yarn by weaving with two strands at once.
The edges are wavy. Wavy edges usually mean the warp strings were not tight enough when you set up the loom. The fix for your next piece is to pull the warp strings tighter before you start weaving. For this piece, a gentle stretch and press with a warm iron (on low heat, with a cloth between the iron and the yarn) can relax some of the waves. Do not press down hard. Just let the warmth soften the yarn.
The yarn keeps slipping off the edge warp string. This happens when the last string on each side is looser than the others. When you tie off your warp at the end of setting up the loom, give that last string an extra tug. You can also weave the first and last few rows a little more loosely than the middle. The edge strings need a little slack to stay in place.
Read: Easy Festive Seasonal Decor Ideas: Creative & Budget-Friendly
Making It Yours: Small Choices That Change the Look
The piece you just made is a foundation. Every choice you made along the way changed how it turned out, and now that you understand the process, you can make different choices next time.
The yarn you pick does most of the work. A single skein of thick, hand-spun style yarn in a color you love will make a simple plain weave look rich. A mix of five different leftovers in colors that clash slightly will look like a textile you bought at a market. Neither is better. Both are valid.
The shape matters too. A long, narrow hanging looks elegant above a doorway or beside a window. A small, square piece looks like a tiny artwork on a bookshelf. You can also weave two small pieces and hang them side by side. The size of your frame sets the limit, and you can change the frame any time.
The fringe at the bottom is another place to play. Long, uneven fringe looks relaxed. Short, even fringe looks tidy. You can braid the fringe, add beads to the ends, or leave it loose. These small details are what turn a practice piece into something you actually want to look at every woven wall hanging craft for beginners.
Frequently Asked Questions
How long does a beginner wall hanging take to make?
Most beginners finish a small piece, about the size of a notebook, in two to three hours. Larger pieces take longer. The first few rows are slow because you are learning the motion. Once your hands understand the over-under rhythm, the work moves quickly.
Can I use yarn I already have instead of buying new supplies?
Yes. Leftover yarn from knitting or crochet projects works perfectly. You can even cut old T-shirts into strips and weave with those. The only thing you should buy new is the warp string, because it needs to be strong and non-stretchy.
Do I need a real weaving loom?
No. A picture frame or a piece of sturdy cardboard is enough for your first few projects. Many people weave for years on simple frames. A real loom becomes useful when you want to make very large pieces or work with very fine yarn, but it is not required to start.
What if my weaving looks bad halfway through?
Keep going. Weaving looks strange in progress. The edges wobble, the rows are uneven, and the colors seem to fight each other. When the piece comes off the loom and gets a gentle stretch, it changes. Almost every woven wall hanging looks better finished than it did on the frame.
How do I clean a woven wall hanging?
Dust it with a soft brush or a vacuum on the lowest setting with a brush attachment. Do not wash it in a machine. If it gets a spot, dab it gently with a damp cloth and mild soap, then let it air dry flat. Most wall hangings are decorative, not functional, so they stay clean with occasional dusting.